Why it matters
A signal needs both a sender and a receiver. A lamp shining into foliage or a message still queued on a phone may not reach anyone. This worked example is for a temperate woodland emergency in a US NPS setting; before a different destination, check its emergency channel and signaling conventions. The outcome is a location report plus a sustainable signaling arrangement. Use the linked drill for controlled practice.
What you’ll need
Tools
- Reachable whistle
- Headlamp with spare power
- Phone or appropriate emergency communication device
- Map and pencil
Materials
- Bright tarp or spare contrasting fabric
- Dry layers and shelter
- Destination emergency instructions
Before this skill
- Scene Safety and Calling for Help
Before you begin
Safety & limits
- In a real emergency contact the destination’s emergency service or use the appropriate SOS function promptly; do not delay urgent help while arranging signals.
- Practice distress patterns silently indoors or on paper. Do not call an emergency number, press SOS or activate a beacon for this exercise. A manufacturer-directed self-test is a separate procedure.
- Stay at the reported location unless immediate danger requires moving. Do not climb, cross water, leave shelter or split the group just to improve a signal.
- No signal fires, firearms, lasers or aircraft-directed practice. Keep lights and mirrors away from eyes and road traffic; an actual rescue crew’s instructions take precedence.
Work carefully, in order
The method
- 01
Make the location report first
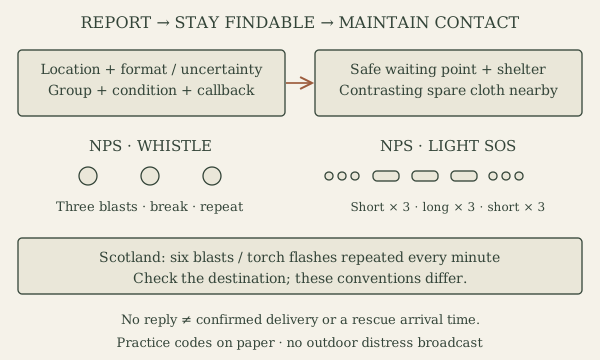
After checking immediate safety, report the group size, location with coordinate format and uncertainty, route, incident and conditions. In the fictional example: “Training scenario only: two walkers at the marked practice junction; one cannot continue; blue tarp and dry layers available.” Add a callback channel. In real use give accurate facts to the emergency receiver and follow their instructions; the fictional words belong only in practice.
- 02
Set up a stable waiting point
Place shelter, insulation and the group together on safe ground. Lay out contrasting spare cloth beside the shelter where an approaching searcher could see it; secure its corners against wind. Keep the fabric needed for warmth on the person. Sketch the waiting point, shelter and visible marker on the exercise worksheet. A larger marker is not useful if reaching it requires leaving safety.
- 03
Use the destination’s sound convention
The NPS printable plan uses three whistle blasts, a break, then another group of three. Its sound signal reduces repeated yelling. For this paper exercise draw three marks, a pause and three marks; do not broadcast a distress call. Mountaineering Scotland instead teaches six blasts or torch flashes repeated every minute. Record which authority applies to the actual destination; do not describe three blasts as universal.
- 04
Choose a visible light signal
The NPS plan describes flashlight SOS: three short flashes, three long flashes, three short flashes. Draw the sequence as ··· ——— ··· on the worksheet, with the longer group visibly distinct. In real use direct the light toward possible searchers from safety and conserve power between attempts. A lamp behind dense vegetation may be hidden. A mirror needs useful sunlight and its own aiming instructions; cloud, darkness and poor alignment limit it.
- 05
Check reception rather than assuming it
For practice ask the nearby receiver to read back the location and group details in an ordinary conversation. In a real call distinguish a dispatcher’s response from a phone icon; an ordinary queued text is not confirmed delivery. Keep the agreed callback channel available. If no network works, use the preplanned communication alternative and local signals while retaining shelter. A flash you can see yourself does not establish that a searcher saw it.
- 06
Maintain the arrangement and close the report
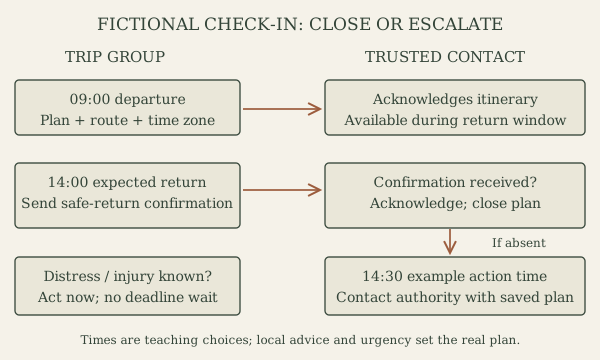
Keep whistle and light accessible, inspect the cloth for displacement and note changes in condition. Follow responder directions on contact, power and any necessary move. Do not switch off a real distress beacon according to this practice schedule; its operating instructions and rescuers govern use. Completion of the tabletop method means a partner can read the location report, identify the chosen regional convention and explain what happens when a message is not delivered. Confirm safe return with the trip contact.
Mistakes to avoid
- Calling every repeated signal an international code
- Treating a queued text or a flashing status light as proof rescuers are coming
- Using the only warm layer as a distant marker
- Wandering toward an aircraft or climbing for reception
If it isn’t working
The bright marker blends into its background
In practice compare it against the actual ground and shelter from the agreed receiver point. Change contrast or placement within the safe waiting area, then check again. Record the observation rather than assigning a visibility distance.
No reply arrives after signaling
No reply does not establish that a signal failed or that help is close. Keep shelter, conserve resources and use the available emergency communication method. Do not enlarge the search area by following a hunch.
A distress device was accidentally activated
Notify the appropriate rescue authority promptly and follow the device’s false-alert instructions. Turning the device off without reporting the alert does not tell responders that everyone is safe.
Then & now
Historical context
NOAA records the first Cospas-Sarsat satellite rescue in 1982. Whistles, reflected sunlight and contrasting cloth remain useful alongside satellite alerts because searchers still need to locate a person on the ground. The NPS and Scottish mountain-rescue instructions illustrate place-specific practice, rather than one universal whistle code.
The modern equivalent
A registered 406 MHz personal locator beacon or configured satellite messenger can add an alert channel. Capabilities and acknowledgment differ by device; learn the exact manual and retain sound, light, shelter and a trip contact.
Sources & review
Editorial draft — field-safety specialist review pending. Written 2026-10-14. Sources support the stated scope; this page has not been professionally certified.
- NPS — Outdoor Emergency Plan ↗
Help reports, staying at the reported location unless immediately threatened, visible shelter and energy conservation. The receiver cards, worksheet and practice distances are original teaching exercises, not rescue performance standards. Checked 2026-10-14.
- NPS — Outdoor Emergency Plan, printable card ↗
Three whistle blasts with a break before repeating; flashlight SOS as three short, three long, three short flashes. These are the NPS conventions used in the US-oriented worked example, not a claim of worldwide uniformity. Checked 2026-10-14.
- Mountaineering Scotland — Calling for help ↗
Contrasting Scottish mountain-rescue advice: six whistle blasts or torch flashes repeated every minute. Local emergency channels and conventions must be checked for the destination. Checked 2026-10-14.
- NOAA SARSAT — Frequently Asked Questions ↗
406 MHz beacon registration, manufacturer-directed self-test, false-alert notification and the first Cospas-Sarsat rescue in 1982. A beacon alert or test does not certify rescue arrival or an ordinary message delivery. Checked 2026-10-14.